-
How to use a Perspective Cube
Posted on April 14th, 2009 No commentsNew visual effects students often have difficulty with the concept and application of the “perspective cube.” A perspective cube is a well constructed box with accurate parallel edges and right angles. Usually it is white with black lines along the edges. Typical construction materials would be white foam core and one inch black paper tape along the edges.
The cube size is somewhat to taste and per your transportation restrictions but it should not be too small. Most appear to be 12″ x 12″ x 12″ or 18″ x 18″ x 18″. I suggest using whole inch measurements and make all side equal as that facilitates quicker set up and ease of reproduction in a Computer Generated Imagery (CGI) environment if needed.
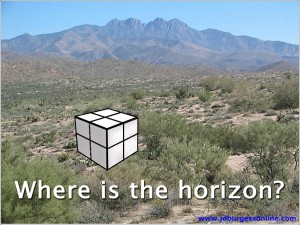
 The perspective cube can be used for multiple reasons. Today we will use the perspective cube to find a horizon line that can’t be seen.
 Suppose you are on location where mountains or vegetation blocks your view of a horizon line and you have no other man-made structures to run perspective lines from to find a vanishing point and horizon line.
Set your camera for the shot you want, then place the perspective cube in the scene. It is imperative that the perspective cube NOT be hand held as accuracy depends upon the cube being level side to side and front to back. So, place your cube on a tripod or “C” stand (grip-stand).
 Rotate the cube so the camera sees two of the sides or the sides and top. Use a level tool on the top of the cube to insure accuracy.
 Take your exposures of the cube for later reference, remove the cube and shoot your scene as normal.
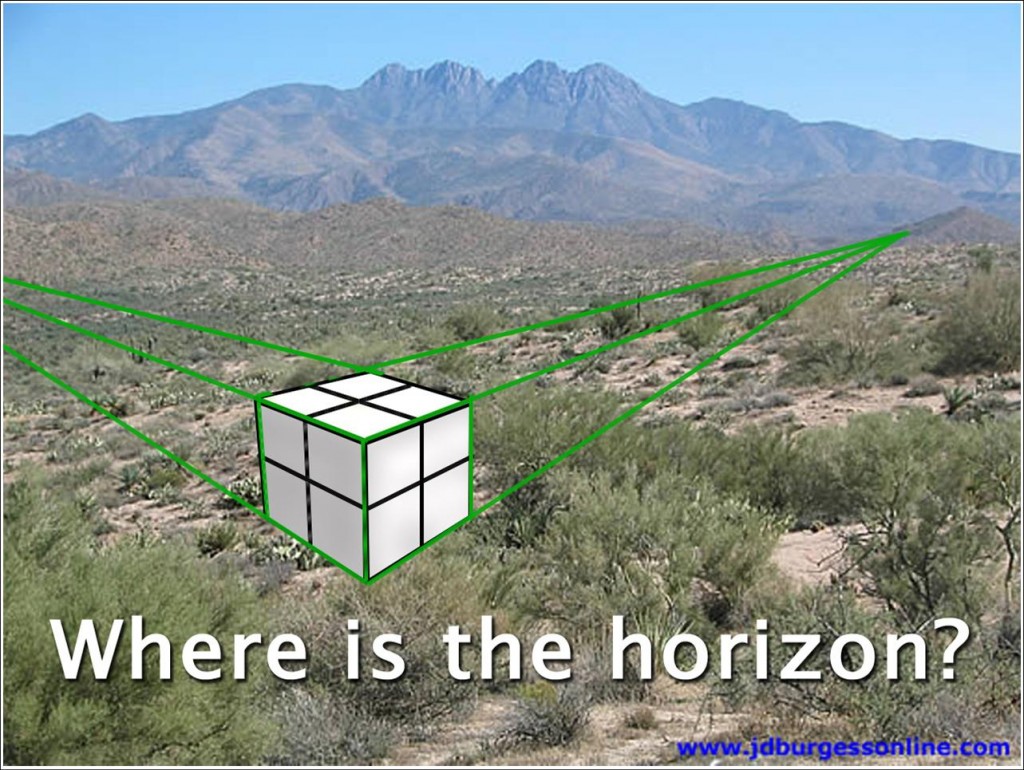
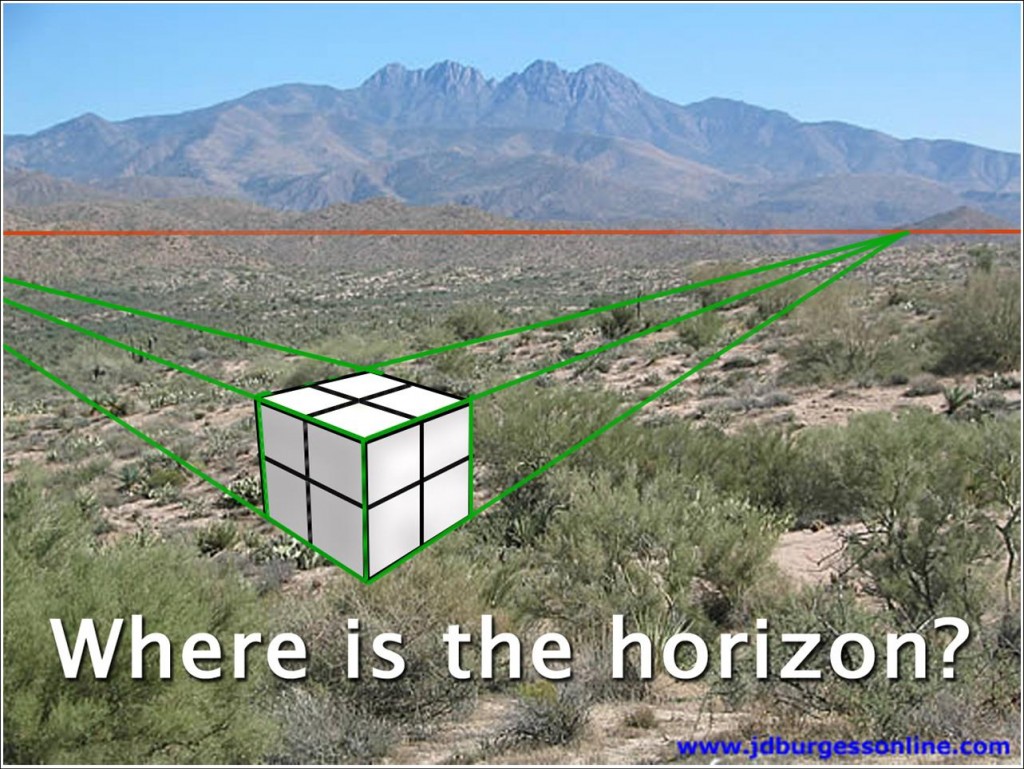
In Photoshop or similar program, you can run lines out from the parallel cube edges to vanishing points. Since you will see at least two sides, you will have two vanishing points.

Run a line between the vanishing points and you will have a horizon line to base your matte painting or effects upon.

(Horizon line information is needed to accurately place objects in the scene so they will not appear pitched over or tilted. If a building’s vanishing point is not on the horizon line it will appear to be pitching down into the ground or aiming up out of the ground. It is also used to do accurate sky & cloud replacement. Yep, clouds have perspective, too!)
Photo courtesy of Jeff Burgess at www.jdburgessonline.com
educational, Film & VFX history, Visual Effects Techniques CGI, educational, Matte Painting, Perspective Cube, Stipes' Universe, students, The Art Institute of Phoenix, Tutorials, Visual Effects Techniques7 responses to “How to use a Perspective Cube”
-
This is very informative. It is nice to have simple instructions like this as reference when making or using a perspective cube.
-
Ah, very nice David. Thank you for sharing such a useful and essential technique!
In my experience, good work starts with knowing the foundation and basics, and esp. the principles behind stuff when moving forward, eh. 😀
LLP,
deg -
dstipes April 29th, 2009 at 22:35
Deg,
Thank you for the encouragement. My goal is to share these basics before they are forgotten or tossed out with the old technology.
-
Hey there David Stipes, Your blog page here is great and love seeing my home state of AZ in your tutorials!!! I just linked yours to mine and had to say hey!!! hope all is well with you ol’ friend and catch up soon.
john eaves
-
Hey John,
Thank you for the kind words! AZ is a great place to film and work.
-
I wouldn’t consider myself a motion graphics/ or visual effects artist, but this is non the less very informative. Thanks Mr. Stipes!
-
Hello Megan,
Good to see you here! I am glad this is helpful to you! I enjoy having your input.
-


Recent Comments